
Today we will be disassembling the most popular handgun in America. The classic 1911. This is a Colt Commander model with a few modifications. This guide is for a Colt model 70 style pistol, some other models, such as Colt model 80s and Kimbers that have an additional firing pin safety that is not covered in this guide at this time. There are a wide variety of manufacturers out there for these pistols, and there are a wide range of variations, but all 1911s will follow this basic design.
Learning to completely disassemble your gun is the best way to learn how it functions, allows the gun to be thoroughly cleaned, and you will be able to see any broken or worn parts, or other potential problems.

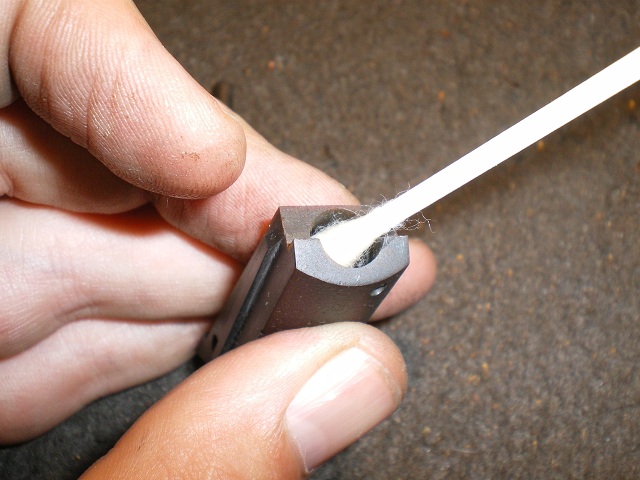
These are the tools we will use. It doesn't take much to take apart a 1911: a screwdriver, a drift punch, a hammer and a bushing wrench should be enough to get it done.


First you need to ensure that the gun is unloaded.


You will need to press in the recoil spring plunger and turn the barrel bushing clockwise until the plunger is released.

Be sure to control the plunger. It is under heavy tension and will happily launch itself across the room if you aren't careful.


Push the slide back until the slide stop lines up with the small notch in the slide rail. Remove the slide stop.

Push the slide forward to separate it from the frame.
SLIDE DISASSEMBLY

The slide has very few moving parts and disassembly is fairly simple.


The recoil spring assembly should just lift out. If your gun has a guide rod, it may need to be unscrewed first.

Remove the barrel bushing. Turn it counter-clockwise until the tab lines up.


Put the barrel link down and slide the barrel forward, out of the slide. Do not remove the barrel link unless it is necessary. The link pin is pressure fit and is very difficult to remove and replace.


Press the firing pin in to release the firing pin stop. Remove the stop and the firing pin. Be careful to control the firing pin, as it is under tension and may decide to aim itself at your eye. If you are working with a series 80 gun, there will be a hole on the bottom of the slide and a plunger that needs to be pressed to remove the firing pin.


Remove the extractor.

The slide should be fully disassembled. Do not remove the sights unless absolutely necessary.
FRAME DISASSEMBLY

First, carefully lower the hammer. Do not allow the hammer to fall freely, as it may crack or otherwise damage the frame.


Remove the grip panels. Be sure that you use the correct size screwdriver. A loose fit can result in marred screw heads.


Use a punch to carefully drift out the mainspring housing pin.

Push the Mainspring housing assembly down, but do not remove it from the frame. It holds the sear spring in place.


Cock the hammer and remove the thumb safety. This will also release the grip safety.


Remove the mainspring housing and the sear spring.


To disassemble the mainspring housing assembly, compress the mainspring and remove the small pin holding it in place. Try to avoid launching any tools or parts.


Remove the hammer.


...and the sear/disconnector.


Remove the slide stop plunger. Note the kink in the spring. That is there to prevent the plunger from launching when the gun is disassembled.


Remove the magazine catch. The part with the screw head is not a screw. It is a latch. Press the magazine release and turn it clockwise until it stops. This should allow you to remove the magazine catch.

Remove the trigger.

The frame should now be fully disassembled.
CLEANING


Use a general purpose gun cleaner and a rag to clean all of the gun's parts. I find that old t-shirts make excellent gun rags.

Use q-tips and a toothbrush to reach those hard-to-reach parts. Try to clean every part as thoroughly as possible, and wipe off all excess solvent.


Run a patch soaked with copper and powder solvent through the bore, then run your bore brush through it several times.

Run dry patches through the barrel until they come out clean.

Repeat the process with Hoppes No. 9.

Wipe down the slide, the frame, the exterior of the barrel and any exterior parts with a very fine coat of oil. This serves to protect the metal. Do not oil any internal parts. Excess oil will collect dust and powder residue.

Apply a thin coat of grease to the rails.
REASSEMBLY
Reassemble the gun in this order:
Frame:
slide stop plunger
trigger
magazine catch
the sear and disconnector
hammer
sear spring (use the mainspring housing to hold the spring in place, but do not fully seat it yet)
grip safety
thumb safety
seat the mainspring housing and insert the drift pin
grips
Slide:
extractor
firing pin
firing pin stop
barrel
barrel bushing
recoil spring and guide rod
Attach the slide to the frame and use the slide stop to lock it in place. Replace the recoil spring plunger and turn the barrel bushing to lock it in place. Last, but not least, check your workspace for any forgotten parts.
Check the safeties to make sure they all function as they should and you should be done.

Congratulations. Your pistol is probably the cleanest it has been since it was brand new.
If you have any questions or problems, feel free to ask me in the comments.
The best I've seen on the web..
ReplyDeleteKudos....I like your style..
Thank you, Magyar. Just trying to be helpful.
ReplyDeleteExcellent photo's and presentation.
ReplyDeleteThis should help someone out there !
Are you planning on a Series 80 breakdown ?
I'm sure some would enjoy that one also.
Regards
Duane USN/Ret
I don't currently have a series 80 handy to do a breakdown on, but when one comes up I'll do that.
ReplyDeleteshowing actual reassembly in picture is the FULL Answer.not just the words...sorry
ReplyDeleteMake video
ReplyDeleteVery nice guide; very nice gun!
ReplyDeleteSuch in-depth disassembly work you've done there Mr. Jones! The 1911 was one of my favorite guns I've ever laid my eyes on, and it is also the first ones that my friend had shown how to field strip in the past, leading me to be fascinated at firearms due to its clockwork beauty.
ReplyDeleteHey man thanks a ton. This helped alot and I learned alot about my gun. I think this is the best guide I have come accross. Thanks again
ReplyDeleteThan you for taking the time to do an excellent job on this procedure. It has helped me a lot.
ReplyDeletethis was very helpful on understanding the disassembly, but could you please make a complete part on how to put it back together and the right way of making sure it is fully functional again?
ReplyDeleteI started out needing to install a ambi safety on my new Kimber but decided I would take it to the range first. Thanks so much, you not only saved me a gunsmith fee but I got to relearn how a 1911A works plus it's clean as a whistle!!!
ReplyDeleteNicely done. I am new to this platform, and this is clear and succinct!
ReplyDeleteThank you very much! One nit on the removal of the magazine catch: I believe that you need to turn the latch counter clockwise, not clockwise.
ReplyDeleteFinally I’ve found your blog, awesome way of explaining each and everything really.
ReplyDelete45 ACP Brass
Very nice. Now I can replace the trigger and install an ambi safety on my new Springfield 1911 R1.
ReplyDeletenicely done! good detail and clear photos
ReplyDeleteGreat information, the pictures help a lot, and very clear, not so dark that they are hard to see.
ReplyDeletesmm panel
ReplyDeleteSMM PANEL
iş ilanları
İnstagram Takipçi Satın Al
Hırdavat
beyazesyateknikservisi.com.tr
servis
tiktok jeton hilesi
Good content. You write beautiful things.
ReplyDeletetaksi
vbet
hacklink
mrbahis
korsan taksi
hacklink
sportsbet
vbet
sportsbet
Good text Write good content success. Thank you
ReplyDeletekibris bahis siteleri
mobil ödeme bahis
poker siteleri
betmatik
bonus veren siteler
tipobet
slot siteleri
kralbet
This post is on your page i will follow your new content.
ReplyDeletesportsbetgiris.net
mrbahis giriş
sportsbet giriş
mrbahis.co
casino siteleri
betgaranti.online
sportsbet
mrbahis
sportsbet
Nice post to read. Surely it will help others a lot to know the matter in detail, like me. Keep up your good work and share with us. If you are interested to know more about Clp Gun Cleaner, Kindly check on the link.
ReplyDeletefatih
ReplyDeletefethiye
gaziemir
gaziosmanpaşa
gebze
CJ8
salt likit
ReplyDeletesalt likit
6Q60H
hatay
ReplyDeletetunceli
amasya
manisa
ağrı
7A5E
kasmalı oyunlar
ReplyDeleteresimli magnet
silivri çatı ustası
çerkezköy çatı ustası
referans kimliği nedir
46RNY
https://saglamproxy.com
ReplyDeletemetin2 proxy
proxy satın al
knight online proxy
mobil proxy satın al
GUWHJ
tokat
ReplyDeleteankara
trabzon
istanbul
izmir
izmit
kocaeli
8TXD
konya
ReplyDeletemalatya
manisa
mardin
mersin
muğla
rize
T8NAF
sakarya
ReplyDeletesamsun
urfa
uşak
van
yalova
yozgat
KİS
adana
ReplyDeleteadıyaman
afyon
aksaray
amasya
antalya
antep
YNZ
ardahan
ReplyDeleteartvin
aydın
balıkesir
bayburt
bilecik
bolu
2MH6HP
tyhjggjkighykujhl
ReplyDeleteمكافحة الحشرات بالاحساء
eregrrhgfdhgfjngj
ReplyDeleteمكافحة الحشرات بالاحساء
التخلص من رائحة المجاري في المطبخ 14xy0gguGk
ReplyDeleteشركة عزل اسطح بالقطيف RZFX0bj9ev
ReplyDeleteشركة مكافحة حشرات بالهفوف zUySuxc2G4
ReplyDeleteشركة تسليك مجاري بالاحساء fQI9jsVxPl
ReplyDeleteشركة مكافحة النمل الابيض بالاحساء mvVLCZ7IvX
ReplyDeleteعزل اسطح وخزانات بالدمام
ReplyDeleteAbEfBVG5